How To Stream On Switch? The Guide
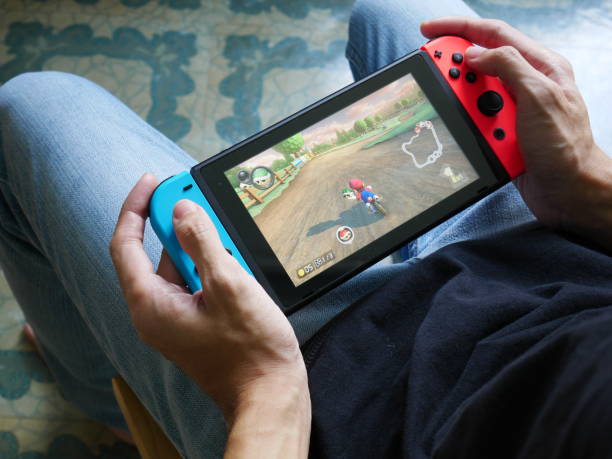
Nintendo has been enthralling the masses with the Nintendo Switch since the year’s beginning. With the Nintendo Switch, gamers have access to everything they need to play or stream for hours. New adventures with Mario, Peach, Donkey Kong, Link, Luigi, and many more are waiting for you. However, with the Switch, video games like Fortnite, FIFA, and Assassins Creed can make their debuts in the Nintendo world. a large amount of material with streaming potential.
Table of Contents
Introduction
Nintendo has been thrilling the masses with the Nintendo Switch since the year’s beginning. With the Nintendo Switch, gamers have access to everything they need to play or stream for hours. New adventures with Mario, Peach, Donkey Kong, Link, Luigi, and many more are waiting for you. However, with the Switch, video games like Fortnite, FIFA, and Assassins Creed can make their debuts in the Nintendo world. a large amount of content with streaming potential.
You are aware of this and desire to share your gameplay with your community. You want to use your Nintendo Switch to stream games like Zelda, Mario Kart, and Animal Crossing. If so, you’ve arrived at the right place. We’ll explain how to stream on your Nintendo Switch and what you’ll need. Additionally, we have separate instructions for Twitch, YouTube, and Facebook because the procedure differs slightly between each platform. Welcoming you to the Nintendo Switch streaming world!
How To Stream Nintendo Switch To Twitch On A Windows Pc
Though you might need an Xbox One or a capture card, streaming Switch gameplay to a Windows PC is not difficult. OBS or Streamlabs should be installed first on your Windows computer because they are both totally free to download and use for streaming.
You’ll need at least two more HDMI cables to connect the consoles to the PC, which is the next requirement.
If you decide to purchase a capture card, make sure the Nintendo Switch is compatible with it. It is best to conduct preliminary research because not every product will function.
Using a capture card will be the first step we take.
Streaming With A Capture Card
Since Elgato capture cards and OBS Studio are the best in the business, we’ll assume you have those for this section. Despite possible slight differences, the steps will still apply to other products on the market.
- Do not dock the Nintendo Switch.
- Disconnect the HDMI cable that is holding the Switch to your monitor and plug it into your Elgato capture card.
- Connect the cable to the capture card in your Elgato.
- The HDMI Out port on the capture card should receive a second HDMI cable.
- The HDMI port on the monitor should receive the other end.
For a better streaming experience, you must next connect OBS to your Twitch account.
- the official Twitch website.
- Access your user profile.
- Account Settings can be accessed by clicking on it.”
- Select “Channel and Videos.””
- Look for something called a “Primary Stream Key.””
- Copy the key.
- Enter OBS Studio and select “File.””
- You should then select “Settings” and “Stream.””
- Paste the key into the text box after enabling Twitch.
- You should now be able to stream if you confirm your selection.
After this part, you’re almost ready to stream the Nintendo Switch content. The third and last step is this one.
- Right-click anyplace in OBS Studio.
- Click “Add” and “Video Capture Device.””
- Name this layer, please.
- Your Elgato capture card can be found by selecting the layer.
- Your Switch’s live video will appear in a box after you confirm your selection.
- Starting at this point, you can move and resize it.
- Click “Start Streaming” when you’re ready to start streaming.”
OBS Studio will allow you to change the volume settings at the bottom of the window before you begin broadcasting.
Streaming Using An Xbox
Surprisingly, Elgato capture cards can be replaced by Xbox One consoles. Utilizing the console’s OneGuide software will be your responsibility. The requirements are essentially the same as those stated above, aside from that.
- Make sure your Nintendo Switch is docked.
- One HDMI cable should be connected from the dock to the Xbox One’s HDMI In port.
- Link the Xbox One up to a display.
- Start OneGuide on your Xbox One.
- Turn the Switch on.
- Choosing the Switch on OneGuide.
- Using an Ethernet cable, join your Xbox to your computer.
You must also link it to OBS since you’ll be streaming to Twitch.
- Visit the Twitch official website.
- Open your user profile.
- A drop-down menu will appear.”
- Select “Channel And Videos” by clicking.”
- Track down the “Primary Stream Key.””
- Copy the key.
- Then select “File” from OBS Studio.”
- After that, select “Settings” and “Stream.””
- The streaming key must be pasted after turning on Twitch streaming.
- Once you confirm your selection, you should be able to stream right away.
You’ll need the Xbox App for your Windows PC at this point.
- Open the Xbox App on your Windows computer.
- Look for the Xbox gaming system.
- Select the option.
- Return to OBS.
- Take screenshots of the Xbox App window using the software.
- Start streaming the live video to Twitch.
Obs Studio Setup:
We’ll walk you through setting up OBS Studio for your Nintendo Switch stream and the necessary configurations. OBS Studio can be easily set up step-by-step.
- OBS Studio should first be downloaded from the official website: https://obsproject.com
- After that, you put it on your PC.
- Once you’ve finished, launch OBS Studio. The “Scenes,” “Sources,” “Audio Mixer,” “Scene Transitions,” and “Control” sections can be found below the black picture at the top of the screen. You only need to concentrate on the first, last, and two areas to get started.
- Select “Stream” from the menu by going to “Settings” in the “Controls” section. Depending on where you want to stream, you can select “Platform” and select Twitch, YouTube, or Facebook.
- The stream key for the streaming service of your choice should be entered here. You can now launch the stream. Now all you have to do is feed OBS the audio and video from the Switch, webcam, and microphone so that something can be seen on Twitch and other streaming services. when you go live.
- The “Source” section of the scene, which is still black, needs to have your capture card added to it. Then, close the settings mask once more. To do this, select “Video capture device” by clicking on the “+.” The majority of the time, OBS recognizes it automatically and displays it under “Device.” Choosing it from the drop-down menu is all that is necessary if this is not the case. You can also apply all other settings in the manner that OBS expects. Close the window.
- To have a picture in OBS, turn on your Nintendo Switch.
- Your microphone and webcam must now be integrated into OBS. Add a source, in this case your webcam, to achieve this. Because the webcam performs a similar function to the Capture Card, it is also referred to as a “video capture device” this time: it sends frames to OBS.
- Regarding the microphone, it is or should be connected to OBS already. The “Audio Mixer” is located near the sources in the center area. The second track stands in for your microphone. Your microphone is properly connected if you can see a ripple there as you speak. If nothing is visible there, select your microphone by clicking the gear wheel next to the track.
- You are prepared to begin once you have adjusted the webcam and capture card windows. To do this, select “Start Stream” from the “Control” section.
How To Stream Nintendo Switch To Twitch On A Mac
You’re best off using a capture card for the procedure since the Xbox App is incompatible with macOS. Since OBS Studio and Streamlabs are both available for Macs, you can use the same hardware even though they run different operating systems.
Streaming With A Capture Card On A Mac
We’ll proceed under the assumption that you have an Elgato capture card installed along with OBS Studio.
- Do not dock your Nintendo Switch.
- Remove the HDMI cable that connects your Switch to your monitor.
- Put your Elgato capture card’s free end of the cable inside.
- A second HDMI cable should be connected to the HDMI Out port on the capture card.
- The HDMI port on the monitor should receive the other end.
After that, you’ll link OBS Studio to Twitch.
- the official Twitch website.
- Enter your user profile’s URL.
- “Settings” should be selected.”
- Go to “Channel And Videos” and select it.”
- The “Primary Stream Key” option can be found there.”
- For later use, make a copy of the key.
- Switch to OBS Studio and select “File.””
- Following that, choose “Settings” and “Stream.””
- Add the key to the field and enable Twitch.
- You should now be able to stream after providing the key.
You can find the third phase’s instructions below.
- Right-click anywhere within OBS Studio,
- To add a video capture device, select “Add” and “Video Capture Device.””
- To help you remember, give the new layer a name.
- Locate your Elgato capture card by selecting the layer.
- Following that, a box containing live video from your Switch will appear.
- From this point on, you can move and adjust its size.
- Click “Start Streaming” when you are prepared to start streaming.”
Alternative Capture Cards
One of the best capture cards for Nintendo Switch gameplay recording is the Elgato HD60 S. Nevertheless, not everyone desires an Elgato. Consider the following alternatives.
Avermedia Live Gamer Mini Capture
The Switch can record at a resolution of 1080p60 at its highest setting with this capture card. In addition to OBS and Xsplit support, there is zero-latency pass-through for fluid recordings. You can transport it anywhere thanks to its small chassis.
Mirabox Usb 3.0 4k Hdmi
In addition to having zero latency, this capture card can record live video at resolutions of up to 1080p60. It is a desirable option for Twitch streaming due to its user-friendly setup. It also seamlessly integrates with the Nintendo Switch.
Razer Ripsaw Hd
With the Ripsaw HD, Razer expanded into the capture card market and promised fluid 1080p60 recordings. You only need to connect the Switch to the card and OBS because it is a plug-and-play device. You are now ready to demonstrate your gaming prowess to the world.
Nintendo Switch Stream To Youtube
Follow these steps if you choose to stream your Nintendo Switch game on YouTube:
- You also require a YouTube account. Contrary to Twitch, you create a Google account that is used for all of the search engine company’s services rather than just a streaming service account.
- Go to the camera icon with the + in the top right corner and choose “Start Livestream” if you have already logged into YouTube after registering.
- Be aware that starting your first Nintendo Switch stream may take up to 24 hours if you have just signed up for YouTube and need to verify your account with your phone number.
- After selecting “Start Livestream,” if the cool down has expired, an input mask will show up. Every pertinent piece of information, including the game’s title, description, and thumbnail, can be entered there. If the latter is not present, the preview will only display a still image from your current stream. You ought to have at least created a thumbnail because this isn’t particularly impressive.
- You will then be shown your stream key, which you must enter into OBS as stated in the chapter “Setting up OBS Studio” under 4. and 5. There is also information on adding a webcam, capture card, and microphone to OBS.
- You can now begin streaming through OBS Studio. Your YouTube stream for your Nintendo Switch will be available right away unless you have chosen “Private” in the stream settings.
How To Stream Nintendo Switch On Facebook
These are the steps to take if you choose to stream your Nintendo Switch game on Facebook:
- Go to Facebook Gaming and sign in using your regular Facebook account first. Create an account first if you don’t already have one.
- You now need to set up a Facebook page. To accomplish this, simply navigate to “Let’s go,” which is somewhat the opposite of creating a Facebook page when you arrive at Facebook Gaming.
- Making a page specifically for those who make gaming videos is the first step. When it says “Create your page,” click the link. Once you have completed the necessary fields, click “Next” to advance to step 2.
- This will instruct you to select an encoder program. Apply the Facebook software’s recommended settings after you’ve done this. There is a detailed explanation of how to do this. Otherwise, you can follow the step-by-step instructions in the “Set up OBS” section of our website to configure the most widely used encoder program for your Nintendo Switch Stream.
- Visit fb.gg/streamer right away. Your dashboard is located here, where you can enter metadata, use tools, and view statistics.
- Select “Set up livestream” from the menu. The stream key can also be found there. As stated in “Setting up OBS,” insert the stream key in the proper location in your broadcaster software.
- Now all you have to do to go live on Facebook with your Nintendo Switch stream is start the stream in your broadcasting software.
Go to “Videos” on your Facebook page, followed by “To Creator Studio,” for each additional stream.

Improve Your Nintendo Switch Stream Quality
Changing the settings in your encoder software is the simplest way to make your stream better. You can do this in OBS Studio by going to the “Control” section, choosing “Settings,” and choosing “Output.”
Depending on the upload speed of your internet connection, you can use a different value for “Video Bitrate” than the standard 2,500 kbit/s. For instance, Twitch suggests 4,500 kbits/s at 720p and 60 frames per second. To begin with, confirm that your CPU or GPU can handle the upload speed and that your internet connection has adequate upload speed. If not, it will eventually come down to jerks. Additionally, you should only use half of your upload volume at once to prevent network fluctuations.
There are additional ways to raise the caliber of your stream. The “Encoder presets” option labeled “Full power” is the best choice for this circumstance. But keep in mind that this frequently isn’t the case since Twitch, YouTube, and Facebook only permit experienced streamers to stream at resolutions no higher than 720p at 60 frames per second. You must stream for a longer period of time in order to improve your streaming quality. You will eventually become an affiliate with Twitch, for instance. This also enables 1080p streaming.
Frequently Asked Questions
More of your queries regarding streaming your preferred Nintendo Switch games on Twitch have been addressed in the following.
What Tools Do I Need?
To broadcast Switch games on Twitch, you will need:
1. a capture card or an Xbox One.
2. A Nintendo Switch.
3. OBS or Streamlabs, or other streaming software
4. Your dock for the Nintendo Switch and an HDMI cable.
5. a strong internet connection that supports streaming.
The majority of what you require is fortunately free. So, once everything is set up, you can begin streaming as much as you like.
Games For The Nintendo Switch Can Be Streamed To Youtube.
Yes!
OBS is a flexible program that integrates with Twitch and YouTube.


0